Baked Physics Method

Baked Physics in Blender
Baking physics animation in blender and getting it into SMD is tricky due to the technical issue with loose meshes without armatures not being able to be exported with BlenderSourceTools. I have come up with a workaround method that uses a scene export to the program fragMOTION to automatically turn mesh objects to SMD exportable animations. I also included an external forum thread method that can use BST but needs some scripts and some contraint work as a second method.
When working in Blender the default grid is rather small for GoldSrc scale, so for a physics scene I highly reccomend you set your Display properties lines to 16, Scale to 32, and Subdivisions to 4. For reference the HL1 scientist fits in a box of roughly dimensions: XYZ[27,13,69,]. Lastly I reccomend using layer groups so you can easily select all active and passive bricks.
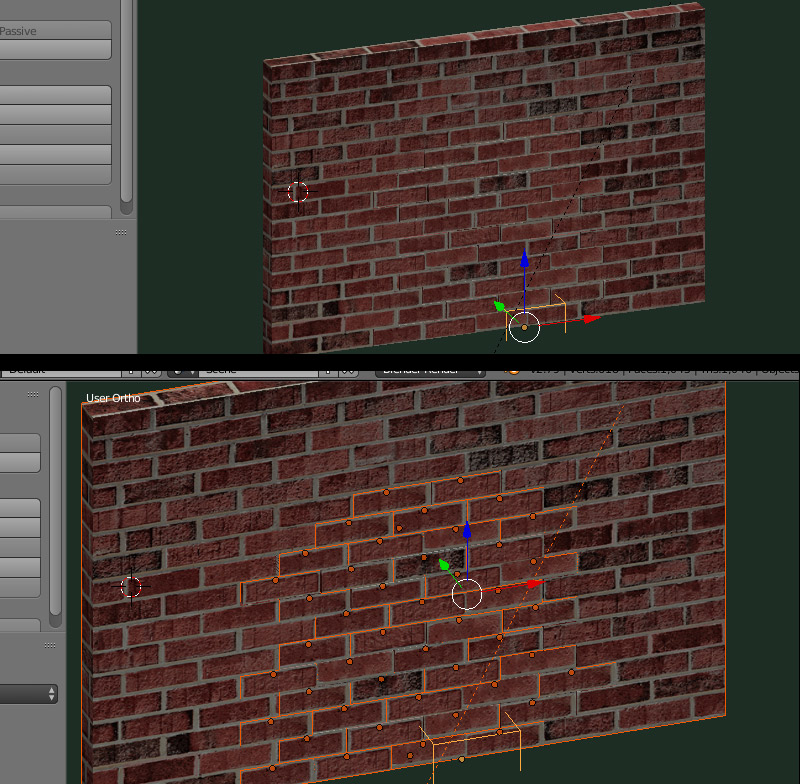
1) Have a collection of meshes ready for your scene. In my case I have a brickwall cutout and a bunch of bricks that fit in the space of this cutout. First thing to do is create an "empty" helper and move it to 0 0 0 in your scene. This will be your root anchor for your model which helps keep the export together and helps if you need more than one SMD export.
2) With all the bricks and outer brickwall mesh selected, press CMD-P to parent all of these to the empty object. For this simulation I want these bricks to be blown out and for that im using a monkey mesh object to do that but will only be used for the simulation and not the final model. You can also use forces and other methods to do this, but I found this a very fast and effective method.
5) Go to the Rigid Body Tools and click the "Add Passive" button. Passive means the wall will act as an immovable but object that other objects can collide with. By default blender sets the collision shape to "mesh". If you need to, there is more options for physics in the physics tab to the right which includes things like mesh shape, friction, ect. Do the same with a piece of ground mesh at grid level.
6) Select all your loose brick objects and set them as "Active" with the "Add active" button. This means that the object is a free moving similated object. Go to the physics tab and with an active brick selected "Enable Deactivation" & "Start Deactivated", and change any other settings like mass or shape if needed.
The reason why we use "deactivation" is so the bricks stay put until the collider object comes in contact; this prevents the wall from possibly crumbling or jittering before the collider object has hit. Then press "Copy From Active" which will copy the selected brick paramaters to all the rest. Verify the settings by deselecting all and click on a random brick to see if it sucessfuly copied the settings.
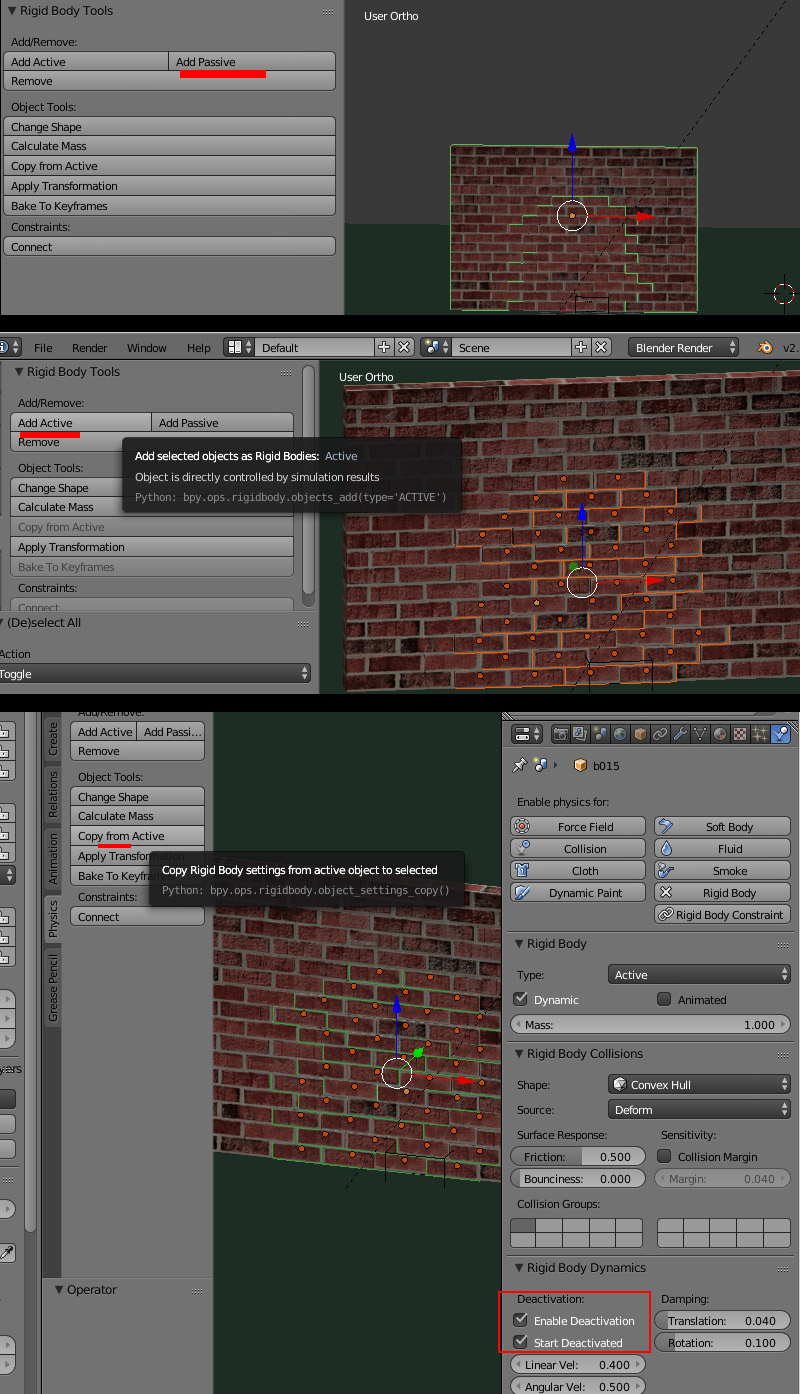
7) Select your collider object and set it to "Active", but then in the physics panel check "Animated". This means the object can interact with Active physics objects but is moved by keyframes. Animated active objects also can pass through Static objects. This will mean we will animate this to push the bricks out of the wall.
8)In your timeline make a quick movement animation. I turned on "Auto Key" and moved the sphere forward through the wall. Once keyframes were set I turned off Autokey.

9) When all is good press play and watch how it simulates. Depending on how complex and how your computer specs are this may lag or go slow. If the scene is not to your liking go back to starting frame and then go back and make any changes. If your timeline does not accomodate the whole simulation length open the "time configuration" tab and increase the length/framecount of the scene.
If your physics simulation has very jittery or innacurate movements, or objects clipping through the floor you can attempt to increase the "Solver Substeps" in the Scene Physics option panel. The final thing to do is play with the "Speed". Ive found setting speed higher produces some better results than increasing gravity as mesh size and scale behave very differently. It also has the added bonus of making less frames out of a complex simulation that may go beyond 100frames/upwards of 100objects*.
More info on Physics found on the Blender manual site.
10)When you are satisfied with the result, save a copy of your scene first. For exporting I will be using a workaround to capture mesh objects to node objects as BlenderSourceTools only can export mesh objects that have a rigged armature. There is a way to do an armature setup on BST forums help link here. If doing that way, then after exporting a reference & sequence Continue to Compiling and Map setup, otherwise continue with my method:
11)Press the "Bake All" button in your physics panel.
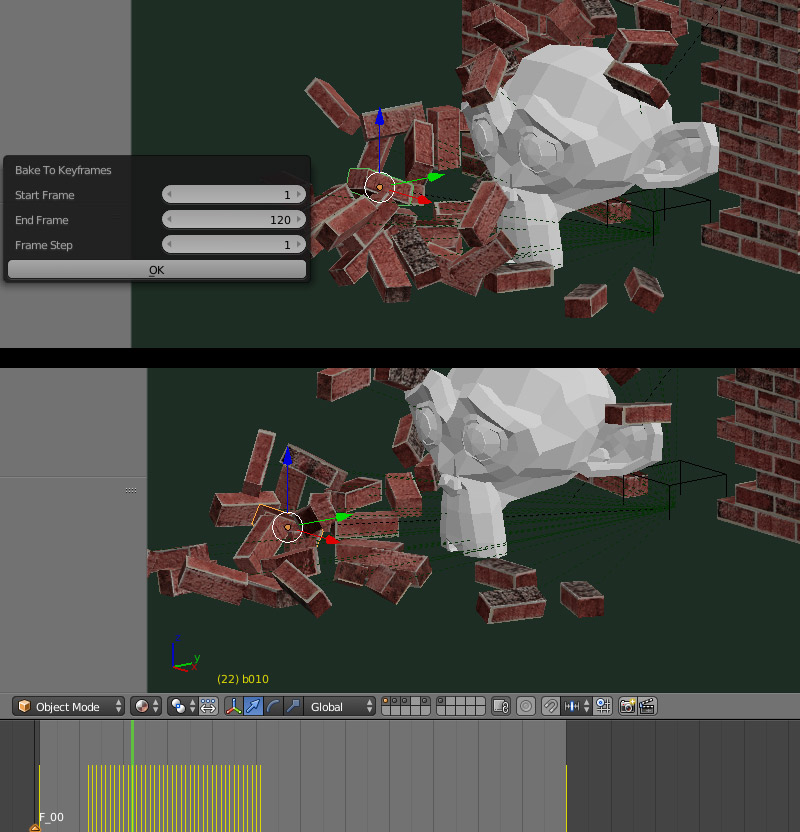
12) First, before exporting be sure to scrub to the first frame. Then select only your brick objects or from layer group; we will be exporting only what is selected so we omit things like scene lights, the monkey collider, ect.
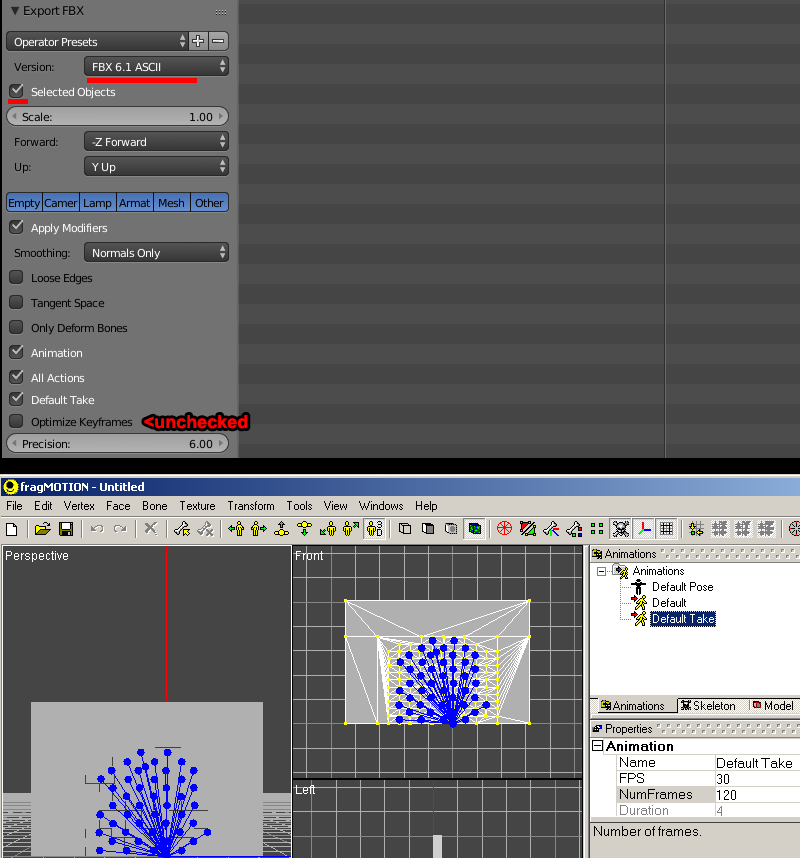
Export as FBX with ASCII 6.1, selected objects only checked and "Optimize animation" UnChecked.
13) Open up fragMOTION and go to file>import and import your FBX file.
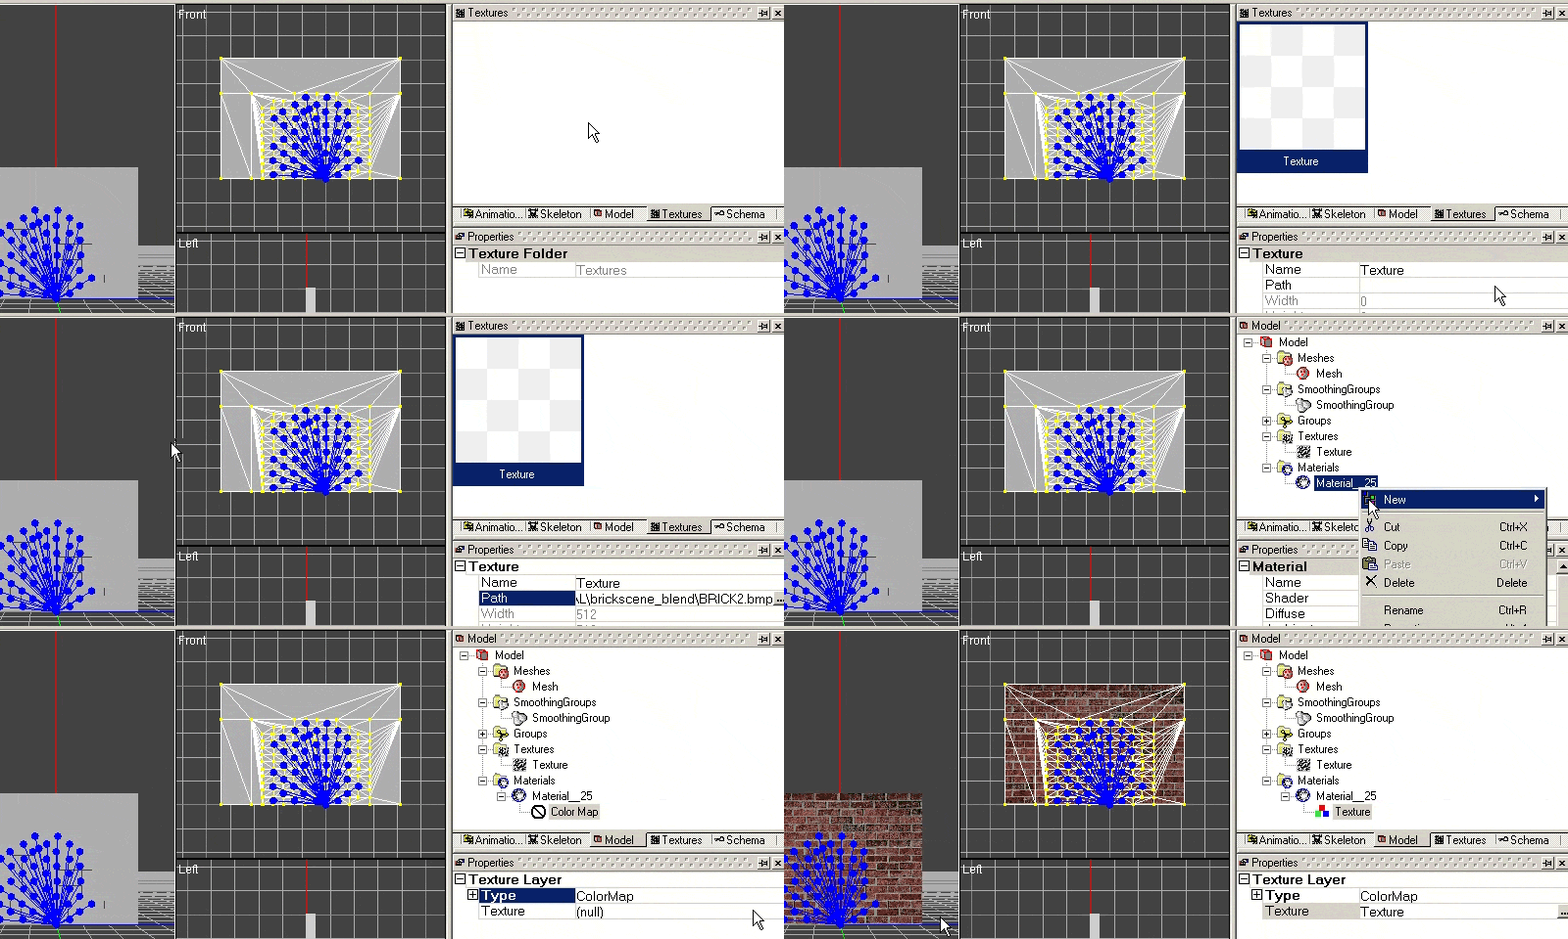
14) We will have to connect the material due to export/import so the sequence to do that is follows: right-click on the empty "texture tab" to create a new texture, then click on the texture and point the path to the BMP of your model. Switch to model tab and right-click the material to create a new texture layer as color map. Then click on the texture layer and select your BMP texure from the scene.
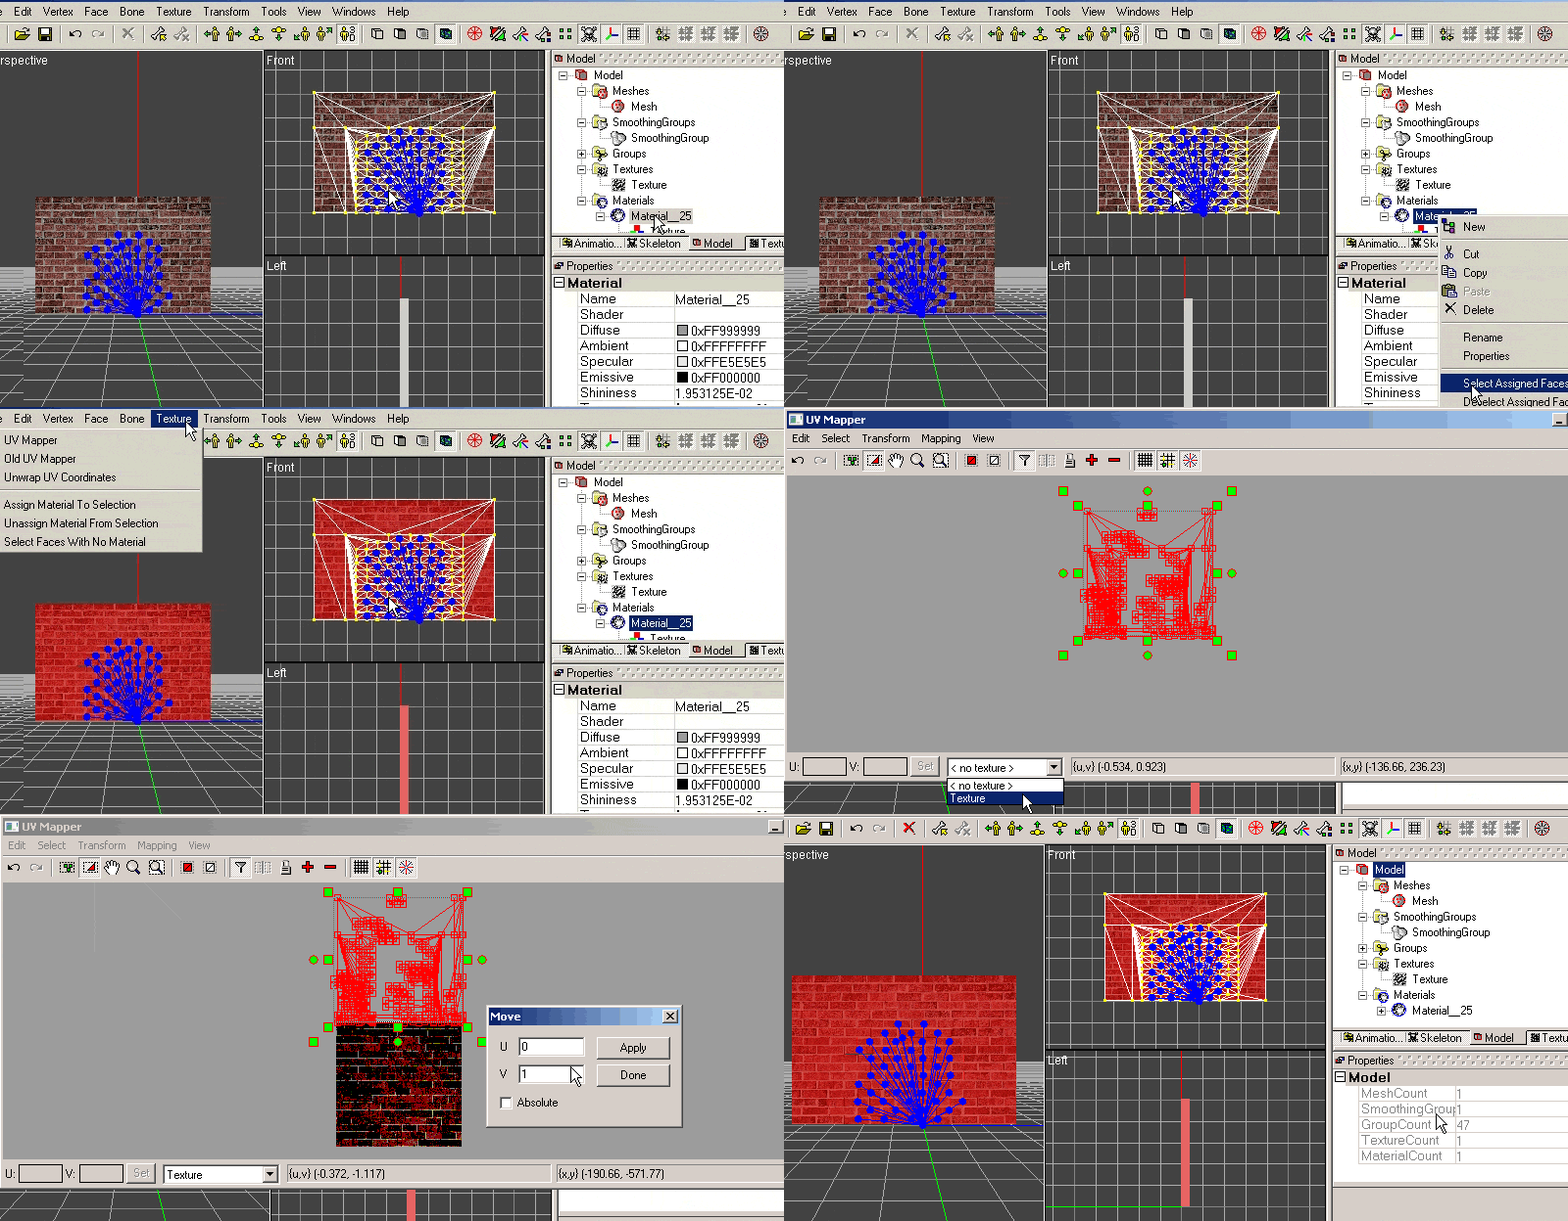
15) One last issue is a UV offset that occurs during the FBX conversion (this can be skipped if using a studiomdl.exe compiler that allows for UV tiling). Right-click your material and "Select Assigned Faces", then go to Texture>UV editor, then select your texture in the texture rollout. Go to Transform>Move and put in V1 and apply, then done. Close the UV editor when finished.
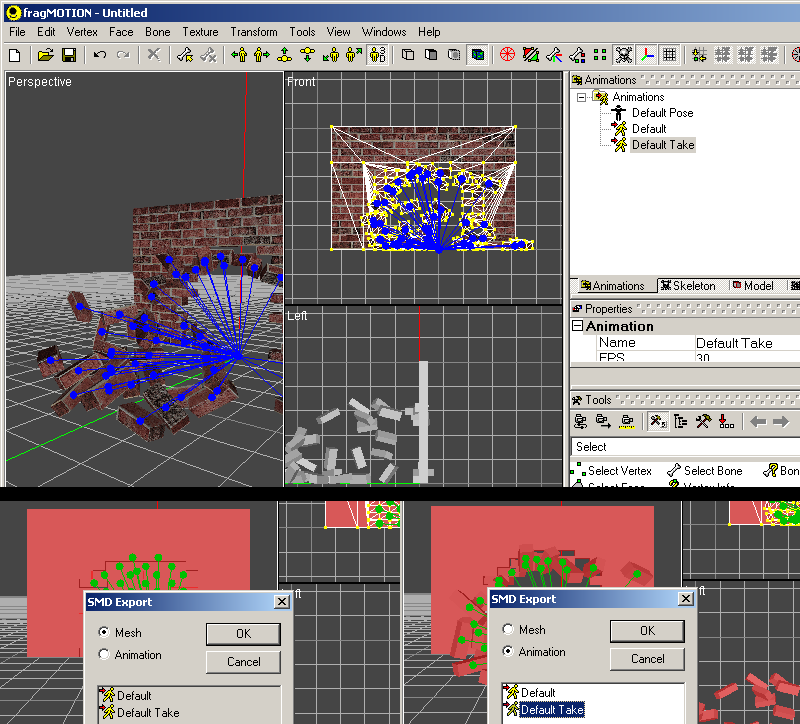
16) You can view your "default take" animation by selecting it and pressing play at the bottom of the window, however make sure you scrub to the first frame when done or select default pose.
Now is the SMD exporting part, go to File > export "Half-Life SMD Files (smd) and check "Mesh" at the options box. Export with a name like "brickscene_ref" for your mesh, then go to export again and this time choose "Animation" and select the "Default take"
 You can continue to compiling and map setup below, but I will also beyond this show a map-collision method as well:
Continue to Compiling and Map setup
Map collision method
Now if you want your physics simulation to collide directly with your map geometry you absolutley can, this just requires a few additional steps.
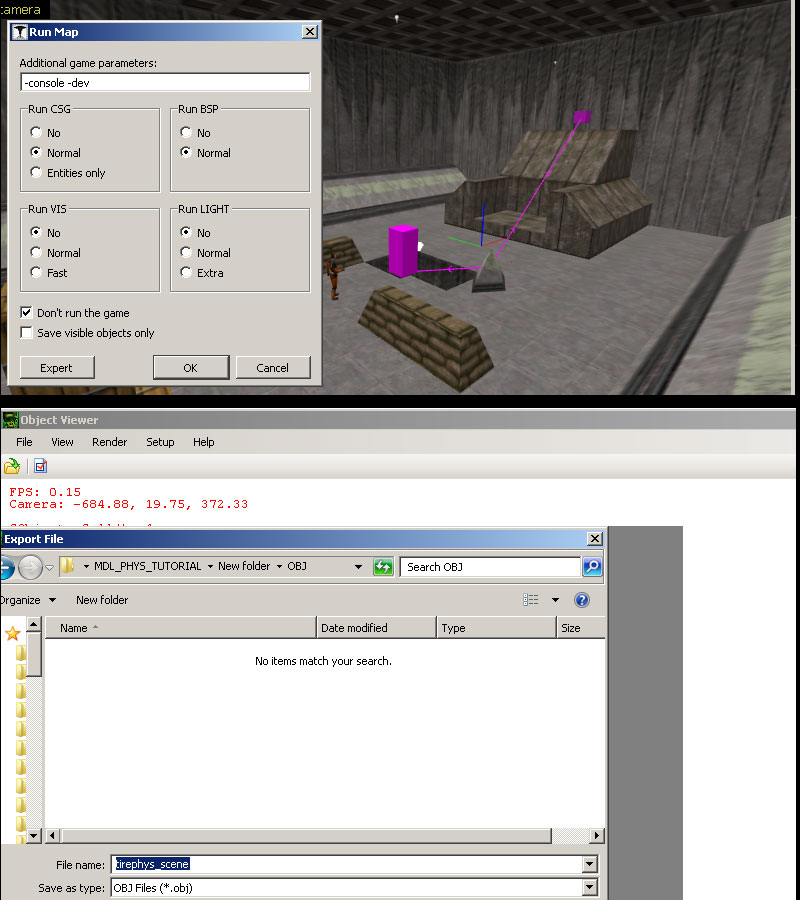
1)Obtain "Crafty" which is a useful GoldSrc multi-tool which includes a BSP viewer that allows for BSP to OBJ. Make a copy of your map and isolate the area where your physics animation will be. Note that you will have to make sure your map compiles (no leaks). Compile your map to a BSP and you can omit "Run VIS" & "Run LIGHT" since we are just needing geometry, also check "do not run map on compile".
2)When the map is successfuly compiled open up the BSP with Crafty. With crafty BSP viewer open, go to file Export>OBJ.
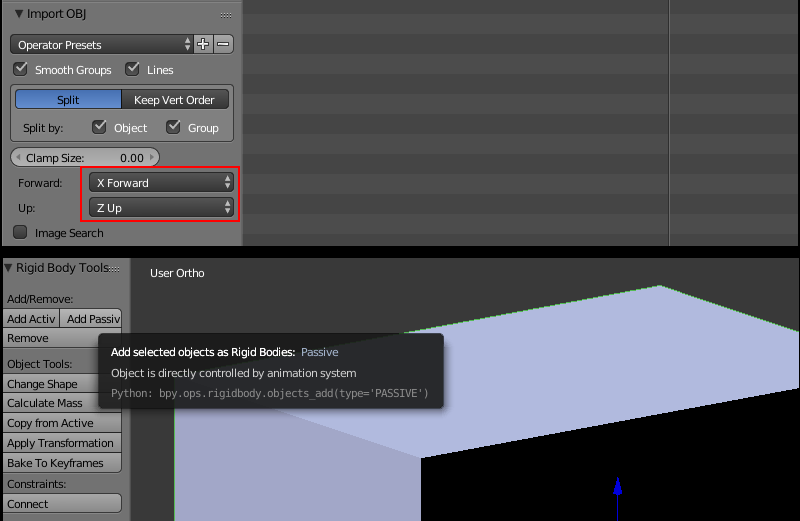
3)Import the OBJ into Blender with Forward as "X Forward" Up as "Z up" and uncheck "image search". When imported I reccomend setting the "View Clip" plane end to something higher like 3000. The BSP object will usually import into several different meshes. With all selected go CMD-J to combine them.
Once combined, set the object to "passive" physics mode.
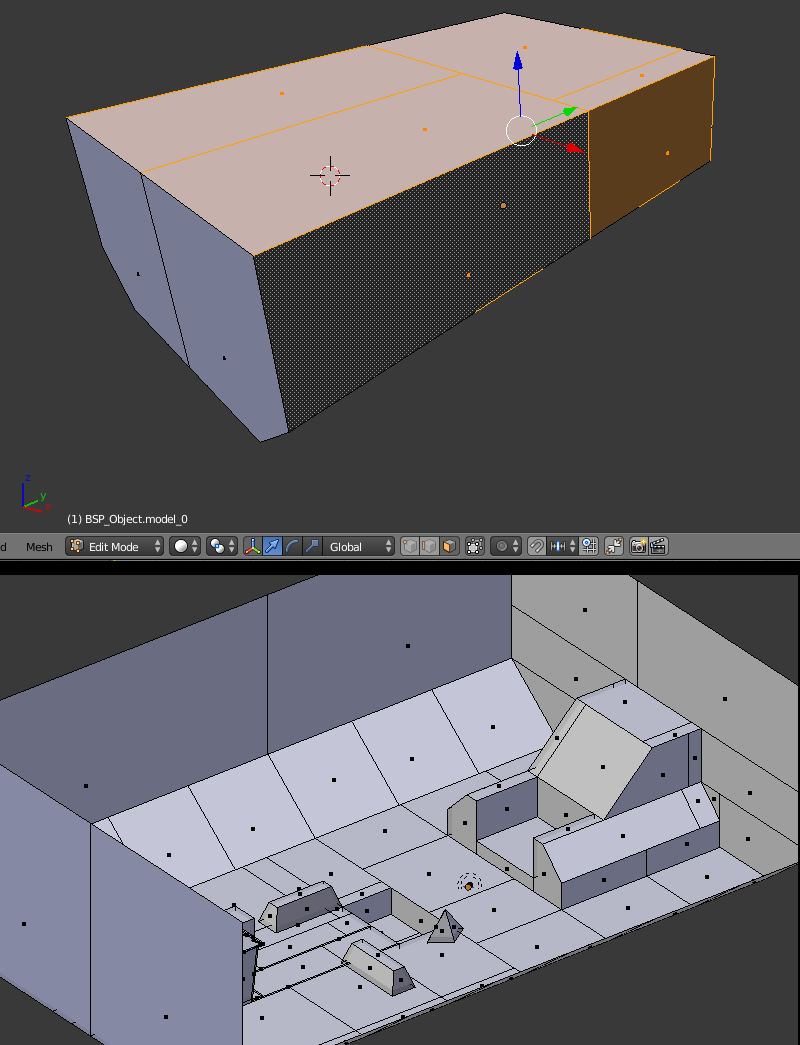
4)Select the outer faces in object mode and then press "hide" to reveal the map geometry.
5)Now with the inside of your OBJ revealed, set it as "Static Rigid Body" and in the MassFX toolbar uncheck "Use ground collisions". We uncheck this because if it was still enabled anything below the grid would be a "ground" and the hole in the OBJ that is below the grid would be collision covered over.
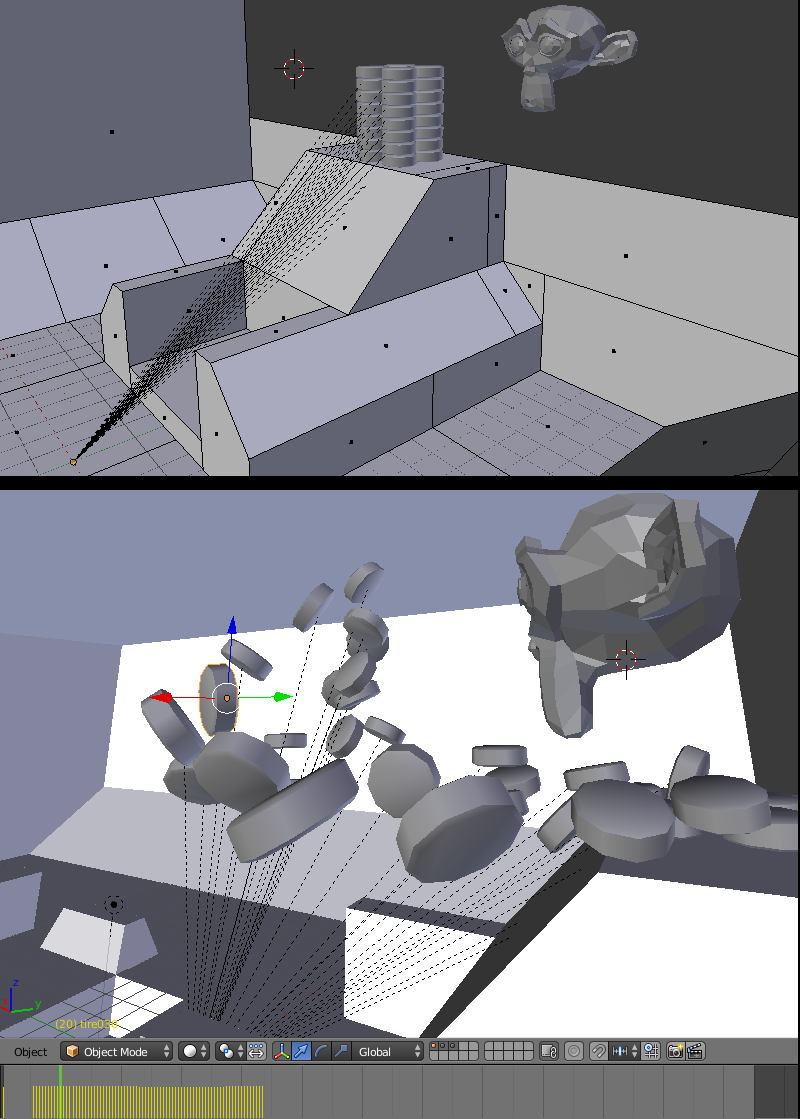
5)For this scene I made a stack of tire objects and set it up in the similar way as before where I parent them to an "empty" helper which will be the origin then turn the tires into active physics objects. Again, I am using an Active animated Monkey mesh to smash the tires in a similar way to the brickscene. Follow all similar exporting and fragMOTION steps as before.
A thing to note about large physics sims like this is that GoldSrc models are lit from their origin point which means they may be affected by pointing a flashlight on that spot. In this demonstration I have it on the ground at 0 0 0 but you can put it on another ground or platform elsewhere. Also if you have difficulty moving the origin point without drastically changing the lighting of the model you can use zhlt_copylight x. "x" being name of target to copy light from. More info here.
6) Bake your keyframes as before with the same methods as the brickscene: Scrub to first frame and export an FBX, then do the fragMOTION procedure. You can now proceed to compiling and map setup. Also below is info on fixing issues that may happen with the compile error. In this case I only had 32 tires so I was fine with a sequence over 120frames.
Continue to Compiling and Map setup
if your animation is longer than 100 frames with upwards of 100 objects, there is a compile error that can happen with complex animations called "sequence "action" is greater than 64K". If you get this error, There is three ways to fix:
First method is using "time remapping" which is a simple change in your scene settings to change your final frames. For example: 120frames (default @30fps) compress to 60 frames, therefore QC set to 15fps (note time remapping cannot be used if you are using BST to export.)

The Second method is at the fragmotion stage where you compress the timeline and adjusting the FPS in the QC as well just like the first method. (In this case I took 120 and reduced it to 60)

Third method, by making the simulation faster and changing the final QC FPS (only issue is first way its harder to determine final FPS. where as the second method is simple math for example: 120frames @30fps compress to 60 frames, therefore QC set to 15fps).
Whatever you go with depending on your animation sometimes having less frames gives a slightly more smooth motion due to more interpolating. Anything below 12fps noticibly loses precision.